
Enabling MATLAB in Jupyter notebooks on Linux
Published:
Introduction
In my previous post, I showed how to enable MATLAB in Jupyter notebooks on Windows. Now it’s the turn of GNU/Linux (Ubuntu).
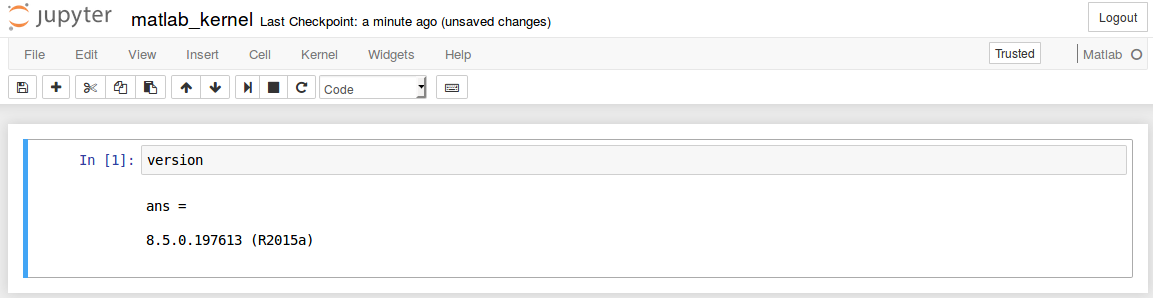
My main headache with enabling the new kernel was having started out with two Anaconda installs and two Python versions (2.7 and 3.5). After a lot of frustration, I wiped both Anacondas and did a clean install of the latest Anaconda with Python 2.7 and 3.5. This tutorial assumes you already have Jupyter and MATLAB installed.
Using the right environment
Although the official MATLAB website says the Python-MATLAB engine works with Python 2.7, 3.4, 3.5, and 3.6, I couldn’t get it to install under Python 3.5. If you try, you’ll see this error:
OSError: MATLAB Engine for Python supports Python version 2.7, 3.3 and 3.4, but your version of Python is 3.5
The error makes it clear you need an older version of Python. I went with 2.7, creating a dedicated environment for it:
conda create -n py27 python=2.7 anaconda
The guidelines to managing Python environments are here.
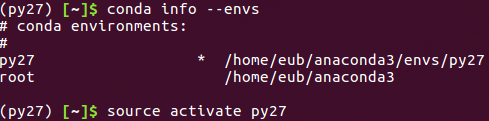
The next step was checking what environments were available:
conda info --envs
And activating Python 2.7 (py27):
source activate py27
Install Python-MATLAB engine
To install the engine that connects the two languages, go to your MATLAB folder, find the Python engine folder, and run setup.py. Here’s how:
Change your working directory to wherever MATLAB lives: cd "MATLABROOT/extern/engines/python"
If you don’t know where your MATLAB is installed, use: locate matlab
Then install the engine (it will only work with MATLAB >=2014b):
sudo python setup.py install
And the latest remaining dependencies:
sudo pip install -U metakernel
sudo pip install -U matlab_kernel
sudo pip install -U pymatbridge
That should do the job. Now open a new Jupyter notebook:
jupyter notebook
Check whether MATLAB shows up among the available engines (top right corner):
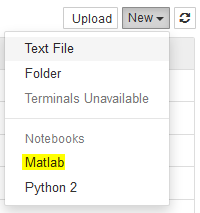
Then check that the notebook actually runs. When I first tried Python 3.5, MATLAB appeared in the list but the kernel died every time I ran any MATLAB code. Switching to Python 2.7, as described here, fixed it.
If everything’s working, the following notebook should run correctly: Even though I get the MetaKernelApp error below, the notebook still works fine: [MetaKernelApp] ERROR | No such comm target registered: jupyter.widget.version 
To leave the environment used to run the notebook, simply type:
source deactivate
Notes
I struggled a fair bit to get everything working, and along the way I also installed Octave (a free MATLAB equivalent). I’m not sure whether that actually helped with running MATLAB inside Jupyter.
While installing the engine, I ran into several errors. Most were probably down to my OS configuration, and all of them were solved by searching for the error message. One of them was:
Error: [I 00:58:19.847 NotebookApp] KernelRestarter: restarting kernel (3/5) /home/eub/anaconda3/bin/python: No module named matlab_kernel
This was caused by installing the Python engine in the wrong environment (my default Python 3.5). Activating Python 2.7 first, then installing the Python-MATLAB engine from there, sorted it out.
There’s probably an alternative way to enable MATLAB in Jupyter without Anaconda: point the installer explicitly at the Python version that supports the Py-MATLAB engine.
In my case: sudo ~/anaconda/pkgs/python-2.7.13-0/bin/python2.7 setup.py install
You might also want to install the engine in a non-default location. MATLAB has a guide for that, which suggests installing Python in your home directory.
There’s also another Jupyter kernel, imatlab, which supposedly works with Python 3.5 and MATLAB R2016b onwards, though I haven’t tried it. As long as my current setup keeps working, I’m in no hurry to wrestle with dependencies again.